How to make
an email collection bar pop-up notification
Magic-WIDGET.COM
An email collection bar pop-up widget is a graphical user interface (GUI) component that appears as a small bar or banner at the top or bottom of a website or within an application, inviting users to sign up for a newsletter or to receive updates via email. The widget typically provides a simple form where users can enter their email address and sometimes other information such as their name, location, or interests.
The email collection bar is often used by businesses and organizations to collect email addresses from potential customers or interested parties, with the aim of building a mailing list that can be used for marketing and promotional purposes. By providing users with an easy way to sign up for updates, businesses can stay in touch with their audience and keep them informed about new products, services, or promotions.
The content of the email collection bar pop-up widget may vary depending on the website or application, but typically includes a headline or call to action, such as “Subscribe to our newsletter”, and a brief description of the benefits of signing up, such as exclusive offers, news, or tips.
The email bar is often designed to be visually appealing and attention-grabbing, with colors and animations that attract the user’s attention without being too intrusive or annoying. The widget may be triggered automatically based on user behavior, such as spending a certain amount of time on a particular page or scrolling to a certain point, or it may be accessed through a designated button or link on the website.
- Build your email list: The primary purpose of an email collection pop-up bar is to collect email addresses from visitors who are interested in your products or services. This can be a great way to build your email list and stay in touch with potential customers.
- Increase conversions: By collecting email addresses, you can stay in touch with visitors who may not be ready to make a purchase or take another action on your website. You can use email marketing to nurture these leads over time and increase conversions.
- Promote a lead magnet: You can use an email collection pop-up bar to promote a lead magnet, such as a free guide, ebook, or webinar. This can be a great way to encourage visitors to sign up for your email list and provide value to them in exchange for their email address.
- Provide exclusive offers: You can use an email collection pop-up bar to offer exclusive discounts or promotions to visitors who sign up for your email list. This can be a great way to incentivize sign-ups and increase conversions.
- Keep visitors informed: By collecting email addresses, you can stay in touch with visitors and keep them informed about important updates related to your business, such as new product launches, sales, or events.
By using an email collection pop-up bar, you can effectively collect email addresses from interested visitors and stay in touch with them over time. However, it’s important to use best practices to ensure that the pop-up bar is not intrusive and does not negatively impact the user experience on your website.
- Offer something of value: To encourage visitors to provide their email address, offer them something of value in exchange, such as a discount code, free guide, or access to exclusive content.
- Keep it simple: Make the email collection pop-up bar simple and easy to understand. Use clear and concise language, and avoid cluttering the pop-up with too much text or too many design elements.
- Choose the right timing: Choose the right timing for the pop-up to appear. Avoid showing it immediately when a visitor lands on your website, as this can be seen as intrusive. Instead, wait until the visitor has had a chance to browse your site for a few seconds or reach a specific page.
- Make it easy to close: Provide an easy way for visitors to close the pop-up if they are not interested. This can be a simple “X” button or a clear message that says “No thanks” or “I’m not interested.”
- Test and refine: Test different variations of the email collection pop-up bar, such as different messaging, design elements, and timing, to see what works best for your audience. Refine your approach over time to optimize your conversion rate.
- Be transparent: Make it clear what the visitor is signing up for and how their email address will be used. Provide a link to your privacy policy or terms and conditions if necessary.
- Use an appropriate frequency: Avoid showing the email collection pop-up bar too frequently. Showing it on every page or every time a visitor lands on your site can be annoying and lead to a negative user experience.
By following these best practices, you can create an email collection pop-up bar that effectively captures email addresses from interested visitors without negatively impacting the user experience on your website.
Create an Account or Sign In and Connect the Website
Find more information on connecting the website to the Magic Widget system here.
Select the Email Collection Bar and Create the Notification

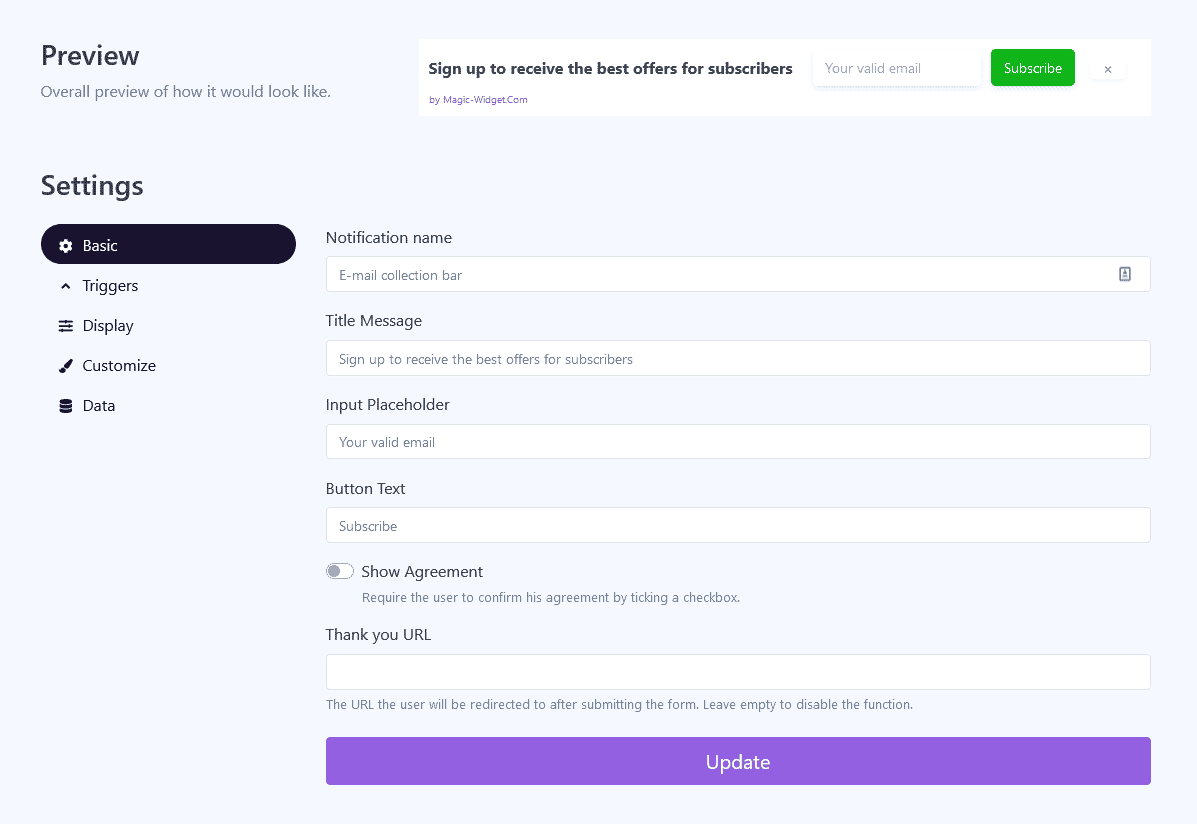
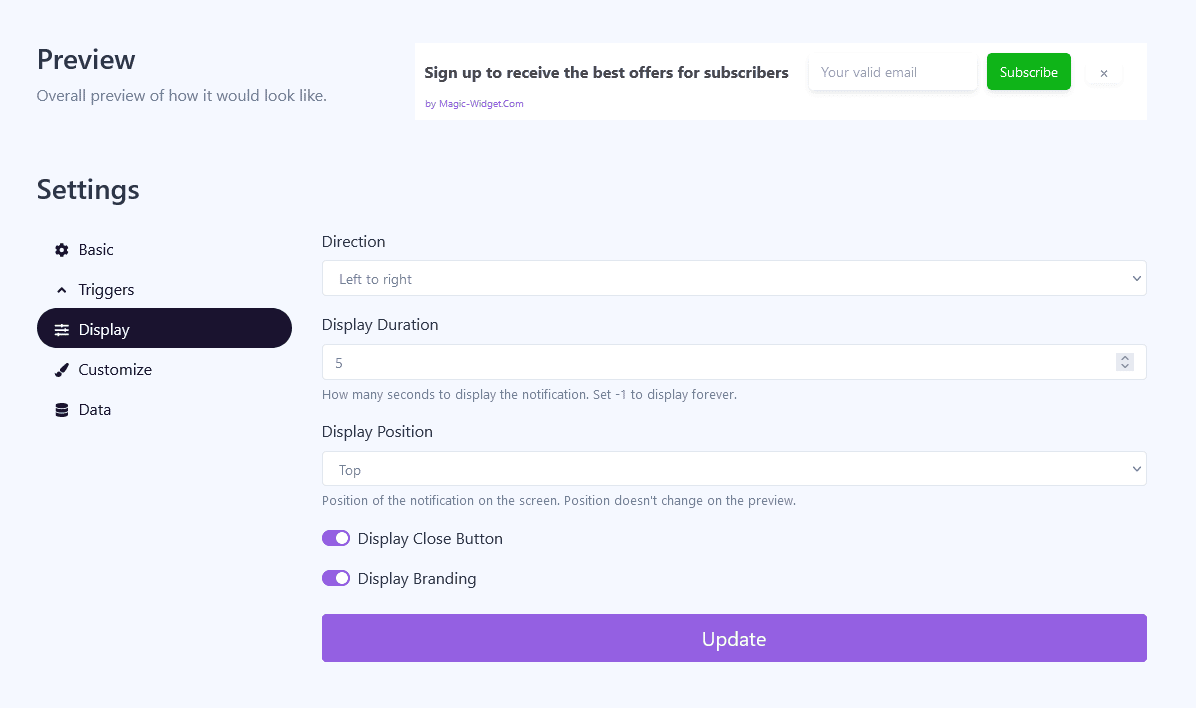
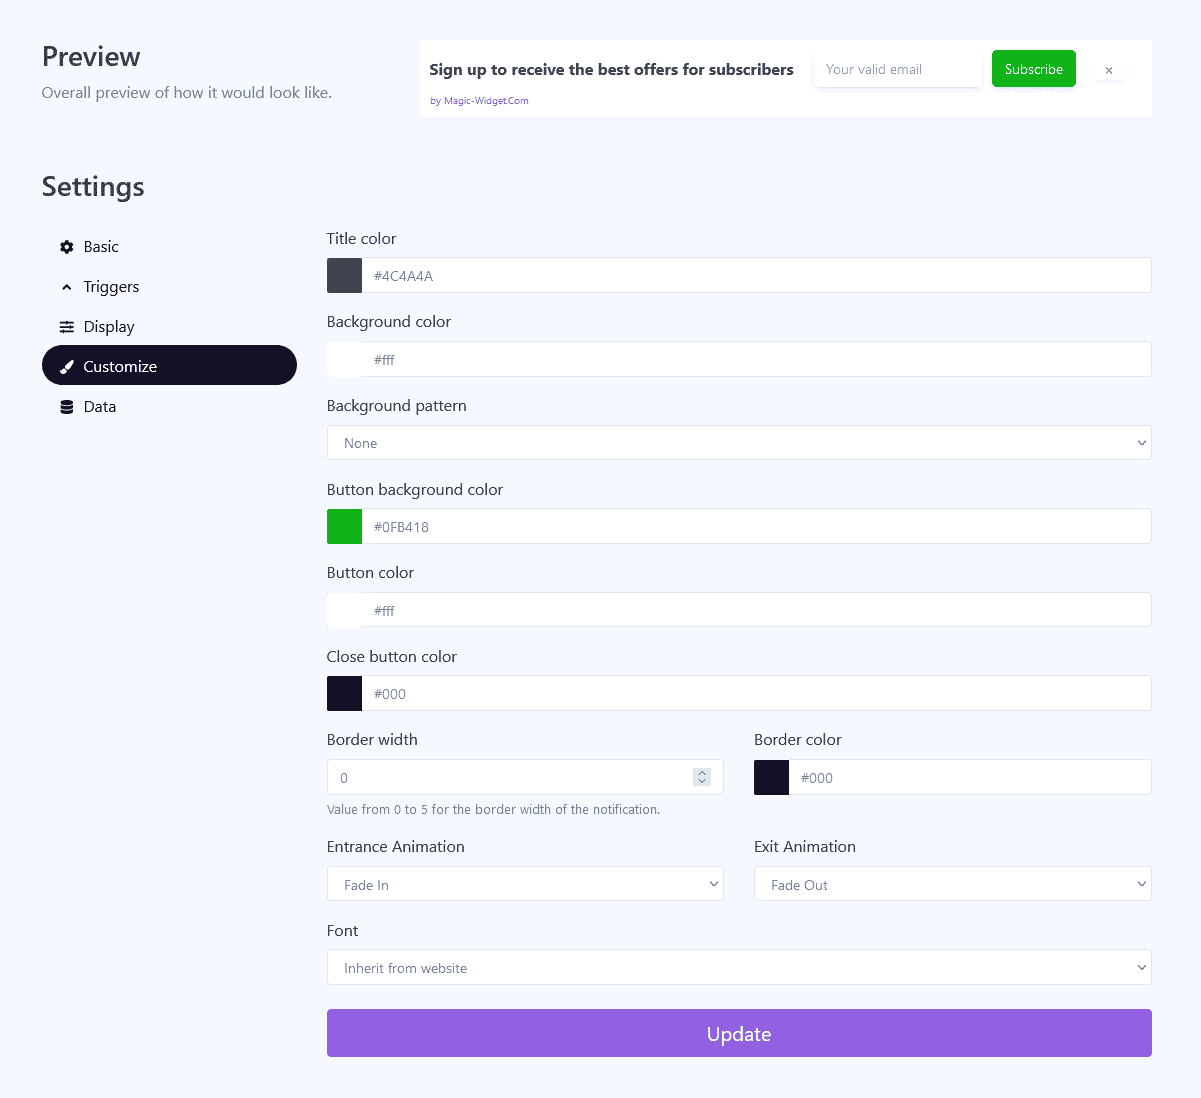
Below is the step-by-step guide on creating a email collection pop-up bar with Magic Widget tools, including all settings and design options.
Basic Settings

Also, specify the button text and “Thank you” page URL to redirect the user after subscription.
Triggers

Display Settings

Design Settings

Data Settings

Use the Webhook to send the data from Countdown widget to another notification. For example, you can copy the Webhook from Latest Conversions or Conversions Counter notification and paste it here.
Activate the Notification

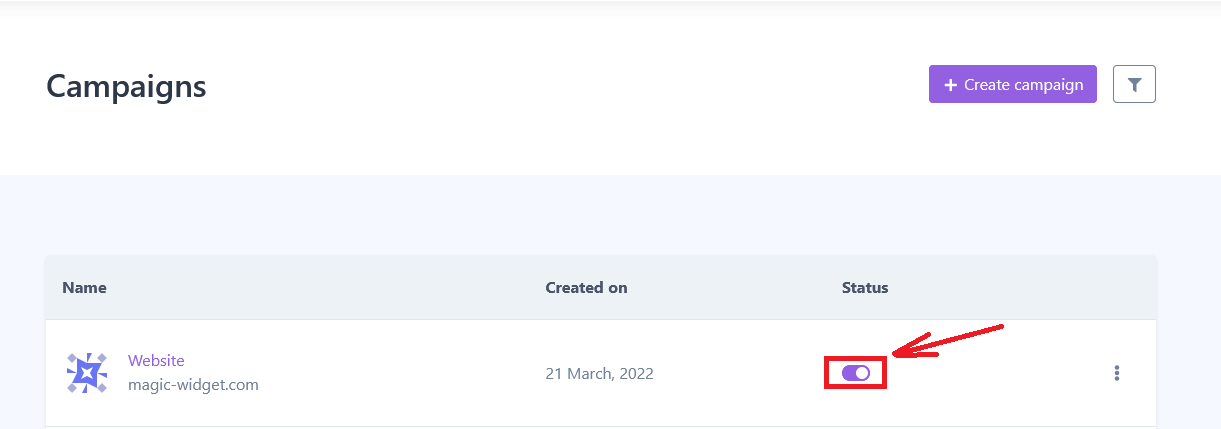
Activate the Campaign

